How to use AWS CloudFormation and deploy a template

This is the right article for you if you want to know:
- what is CloudFormation?
- how to write a CloudFormation template
- deploy CloudFormation template from the command line interface
- deploy CloudFormation template from AWS web interface
What is CloudFormation?
AWS CloudFormation is an Amazon infrastructure-as-a-code service to easily group and automate the deployment of resources in the AWS Cloud. In fact, creating a model is essential when we want to reuse a set of resources that depend on each other, replicate or migrate the same configuration several times without making mistakes.
But before we begin, let’s start with a small definition: what is a stack?
In computer science, a stack is an abstract data type that serves as a collection of elements, with two main principal operations:
Push, which adds an element to the collection, and Pop, which removes the most recently added element that was not yet removed.
Stack (abstract data type) – Wikipedia
CloudFormation is the tool in the AWS cloud that allows us to create a stack of internal or external resources. We can write the CloudFormation templates using JSON or YAML languages, and describe the properties and dependencies of each resource within the stack.
Take the following example:
AWSTemplateFormatVersion: "2010-09-09"
Description: MySQL dump to Amazon S3 with Python
Resources:
  Bucket:
    Type: AWS::S3::Bucket
    DependsOn:
      - SNSTopicPolicy
    Properties:
      BucketName: !Join ["-", [!Ref AWS::StackName, "bucket"]]
      AccessControl: Private
      PublicAccessBlockConfiguration:
        BlockPublicAcls: True
        BlockPublicPolicy: True
        IgnorePublicAcls: True
        RestrictPublicBuckets: True
      NotificationConfiguration:
        TopicConfigurations:
          - Topic: !Ref Topic
            Event: s3:ObjectCreated:*
  SNSTopicPolicy:
    Type: AWS::SNS::TopicPolicy
    Properties:
      PolicyDocument:
        Statement:
          - Effect: Allow
            Principal:
              Service: s3.amazonaws.com
            Action: sns:Publish
            Resource: !Ref Topic
            Condition:
              ArnLike:
                aws:SourceArn:
                  !Join ["", ["arn:aws:s3:::", !Ref AWS::StackName, "-bucket"]]
The template we have just seen does nothing more than creating two resources related to each other:
- a private S3 bucket
- an SNS Topic Policy that allows the S3 resource to invoke an SNS Topic to send an email when we create an object in the bucket.
This simple example demonstrates how it is possible to declare dependency between two resources using CloudFormation templates. Indeed, through the DependsOn keyword, we declare that the Bucket resource depends on the SNSTopicPolicy resource. We will see how to create the full CloudFormation template later in this article.
How to write a CloudFormation template
We can write CloudFormation templates using JSON or YAML languages. As we already said, to write a template we need to describe each resource in detail, and to specify every property and every dependency that the resource has inside the stack.
In this article, we will create a complete CloudFormation template step-by-step in order to obtain a stack with 3 resources:
- S3 bucket: a simple storage service by AWS to store and retrieve object efficiently;
- SNS Topic: to notify an email every time we create an object inside the S3 bucket;
- SNS Topic Policy: to give the SNS Topic the privileges to listen to the S3 bucket “putObject” event.
Let’s see now how to set up our first template. To start, create a “stack.yml” file and paste this code:
AWSTemplateFormatVersion: "2010-09-09"
Description: CloudFormation example template from Polynique
Parameters:
  Email:
    Type: String
    Default: email@example.com
    Description: Email to receive S3 object created notification
  BucketName:
    Type: String
    Default: bucket
    Description: Unique S3 bucket name
Resources:
  # ...
Note that we are declaring two parameters, in order to be able to reference these values later in the template:
- Email: the default value is “email@example.com”, will be the recipient to receive the SNS email notification;
- BucketName: default is “bucket”, we concatenate this value together with the stack name to generate a unique bucket name.
Create the S3 bucket resource
After the Resources property, we are going to create the template for each resource. Let’s get started with the S3 bucket.
Paste the following code after the “Resources” property in the “stack.yml” file:
Bucket:
  Type: AWS::S3::Bucket
  DependsOn:
    - SNSTopicPolicy
  Properties:
    BucketName: !Join ["-", [!Ref AWS::StackName, !Ref BucketName]]
    AccessControl: Private
    PublicAccessBlockConfiguration:
      BlockPublicAcls: True
      BlockPublicPolicy: True
      IgnorePublicAcls: True
      RestrictPublicBuckets: True
    NotificationConfiguration:
      TopicConfigurations:
        - Topic: !Ref Topic
          Event: s3:ObjectCreated:*
Hey! Some definitions!
- !Ref function: we use
!Refto “reference” a dynamic value from the template. For example,!Ref AWS::StackNamerefers to the variable stack name or!Ref Bucketrefers to the S3 bucket name; - !Join function: we use
!Jointo “join” strings with variables. For example,!Join ["-", [!Ref Bucket, "resource"]]will use “-” as character to join the variable!Ref Bucket(the reference to the name of the bucket) with the string “resource”, producing something like “mybucket-resource”
Also, if we read the template, we see that:
- BucketName: we use the StackName to dynamically generate the name of the bucket, together with the “BucketName” variable. This means that, if the stack name is “mystack” and the BucketName parameter is “mybucket”, BucketName will be: “mystack-mybucket”. We do this to reduce the chance of having an already used bucket name because in AWS every bucket must have a unique name.
- PublicAccessBlockConfiguration: the S3 bucket is private;
- NotificationConfiguration: we specify to send a notification to the
!Ref Topicresource when thes3:ObjectCreatedevent will trigger. We will create the Topic resource later in this tutorial; - DependsOn SNSTopicPolicy: the Bucket resource depends on the SNSTopicPolicy resource. This is important because explicitly says to CloudFormation to create the SNSTopicPolicy followed by the Bucket;
Create the SNS Topic resource
Let’s now create the SNS Topic resource that will send a notification to a specific email address. To do so, paste the following code into the “stack.yml” file:
Topic:
  Type: AWS::SNS::Topic
  Properties:
    DisplayName: !Join ["-", [!Ref AWS::StackName, "topic"]]
    TopicName: !Join ["-", [!Ref AWS::StackName, "topic"]]
    Subscription:
      - Protocol: email
        Endpoint: !Ref Email
This is pretty easy:
- DisplayName and TopicName: as we saw in the Bucket template, we use the stack name to generate the name of the Topic dynamically;
- Subscription: we specify that the topic is an email subscription, and the email to subscribe is the value retrieved from the Email parameter (email@example.com)
Create SNS Topic Policy resource
Finally, we need to create the Policy to give the permissions to the S3 bucket to invoke the SNS notification when and object is created.
To do so, paste the following code into the “stack.yml” file:
SNSTopicPolicy:
  Type: AWS::SNS::TopicPolicy
  Properties:
    PolicyDocument:
      Statement:
        - Effect: Allow
          Principal:
            Service: s3.amazonaws.com
          Action: sns:Publish
          Resource: !Ref Topic
          Condition:
            ArnLike:
              aws:SourceArn:
                !Join [
                  "",
                  [
                    "arn:aws:s3:::",
                    !Join ["-", [!Ref AWS::StackName, !Ref BucketName]],
                  ],
                ]
    Topics:
      - !Ref Topic
Like we saw before, we use the BucketName parameter and the StackName to reference the bucket resource, and !Ref Topic to reference the SNS Topic resource.
Complete CloudFormation template
Here you can find the complete “stack.yml”:
AWSTemplateFormatVersion: "2010-09-09"
Description: CloudFormation example template from Polynique
Parameters:
  Email:
    Type: String
    Default: email@example.com
    Description: Email to receive S3 object created notification
  BucketName:
    Type: String
    Default: bucket
    Description: Unique S3 bucket name
Resources:
  Bucket:
    Type: AWS::S3::Bucket
    DependsOn:
      - SNSTopicPolicy
    Properties:
      BucketName: !Join ["-", [!Ref AWS::StackName, !Ref BucketName]]
      AccessControl: Private
      PublicAccessBlockConfiguration:
        BlockPublicAcls: True
        BlockPublicPolicy: True
        IgnorePublicAcls: True
        RestrictPublicBuckets: True
      NotificationConfiguration:
        TopicConfigurations:
          - Topic: !Ref Topic
            Event: s3:ObjectCreated:*
  Topic:
    Type: AWS::SNS::Topic
    Properties:
      DisplayName: !Join ["-", [!Ref AWS::StackName, "topic"]]
      TopicName: !Join ["-", [!Ref AWS::StackName, "topic"]]
      Subscription:
        - Protocol: email
          Endpoint: !Ref Email
  SNSTopicPolicy:
    Type: AWS::SNS::TopicPolicy
    Properties:
      PolicyDocument:
        Statement:
          - Effect: Allow
            Principal:
              Service: s3.amazonaws.com
            Action: sns:Publish
            Resource: !Ref Topic
            Condition:
              ArnLike:
                aws:SourceArn:
                  !Join [
                    "",
                    [
                      "arn:aws:s3:::",
                      !Join ["-", [!Ref AWS::StackName, !Ref BucketName]],
                    ],
                  ]
      Topics:
        - !Ref Topic
Deploy CloudFormation template from CLI
To deploy a CloudFormation template using the command line interface, firstly we need to install the AWS CLI. After the installation, we need to configure the CLI to access our AWS account and publish the resources in a specific region.
To configure the AWS CLI, run:
aws configureAfter the AWS CLI is set up, we are now finally able to deploy a CloudFormation template. To do so, open a terminal window and go to the directory where you created the “stack.yml” file.
Once in the directory, you can simply run:
aws cloudformation deploy --template-file stack.yml --stack-name my-cloudformation-example-template --capabilities CAPABILITY_NAMED_IAMThe “–stack-name” argument is followed by the name you want to give to the stack. In my case, I’m using my-cloudformation-example-template, but you can replace it with any other name you want to assign to your stack. Also, “–capabilities CAPABILITY_NAMED_IAM” is required because we are creating an SNSTopicPolicy.
Deploy a template with parameters
As you may remember, we created some parameters in our “stack.yml” template file. How do we override those parameters?
This is straightforward. To override a template parameter, we add the “—parameter-overrides” argument followed by “ParameterName=value”. For example, if we want to change the Email that will receive the SNS notification, we just need to run the following command:
aws cloudformation deploy --template-file stack.yml --stack-name my-cloudformation-example-template --parameter-overrides Email=mynewemail@example.com --capabilities CAPABILITY_NAMED_IAMAlso, keep in mind that you can update the parameters re-deploying the stack. Indeed, every time you run the command with different values, the CloudFormation stack will update with the new parameters.
Deploy CloudFormation template from AWS web
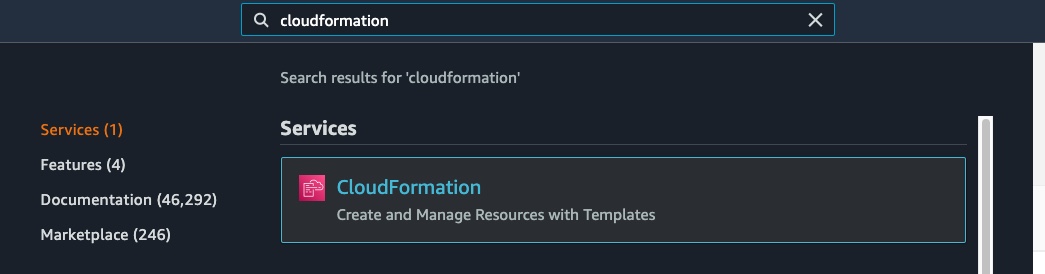
To deploy a CloudFormation template using AWS web interface, go to the AWS console and search for “CloudFormation”:
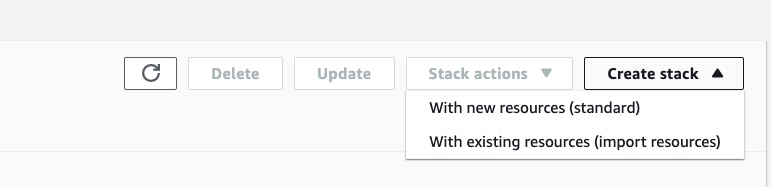
then click on “CloudFormation”. Into the CloudFormation dashboard, click on the “Create stack” and then “With new resources (standard)” button:
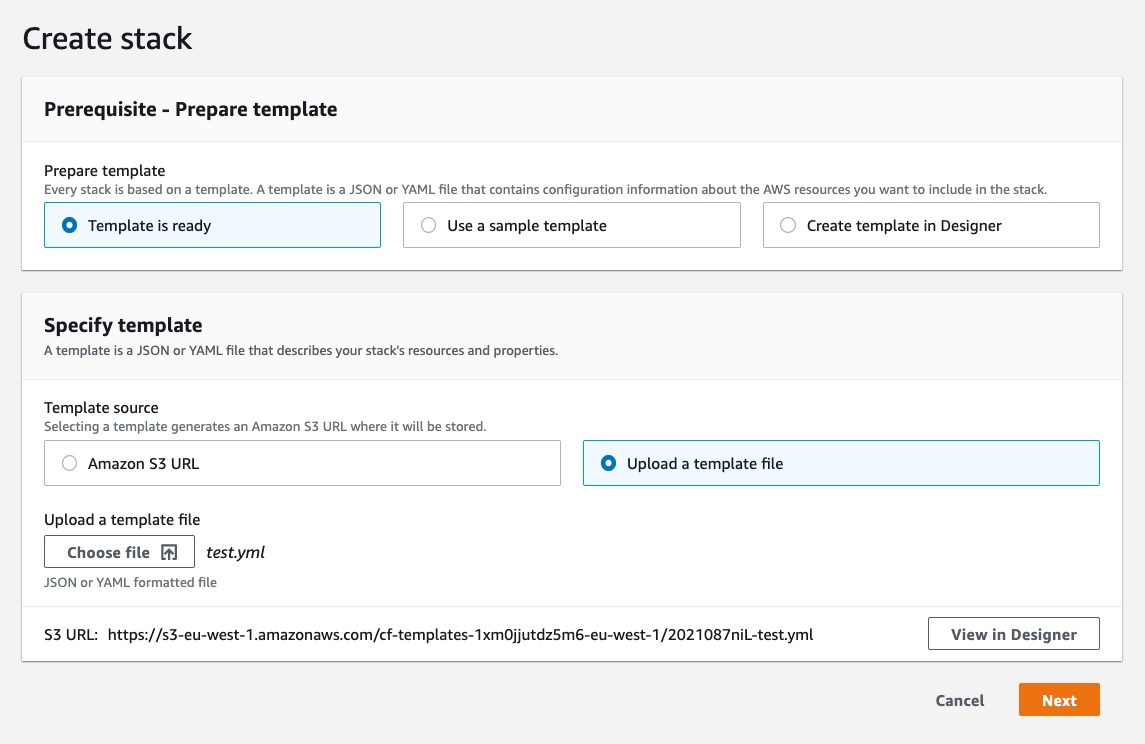
This will open a guided wizard to create the stack. Firstly, we need to prepare the template and upload the “stack.yml” file we created in the previous section. Click on “Template is ready”, “Upload a template file” and “Choose file” to upload the stack file:
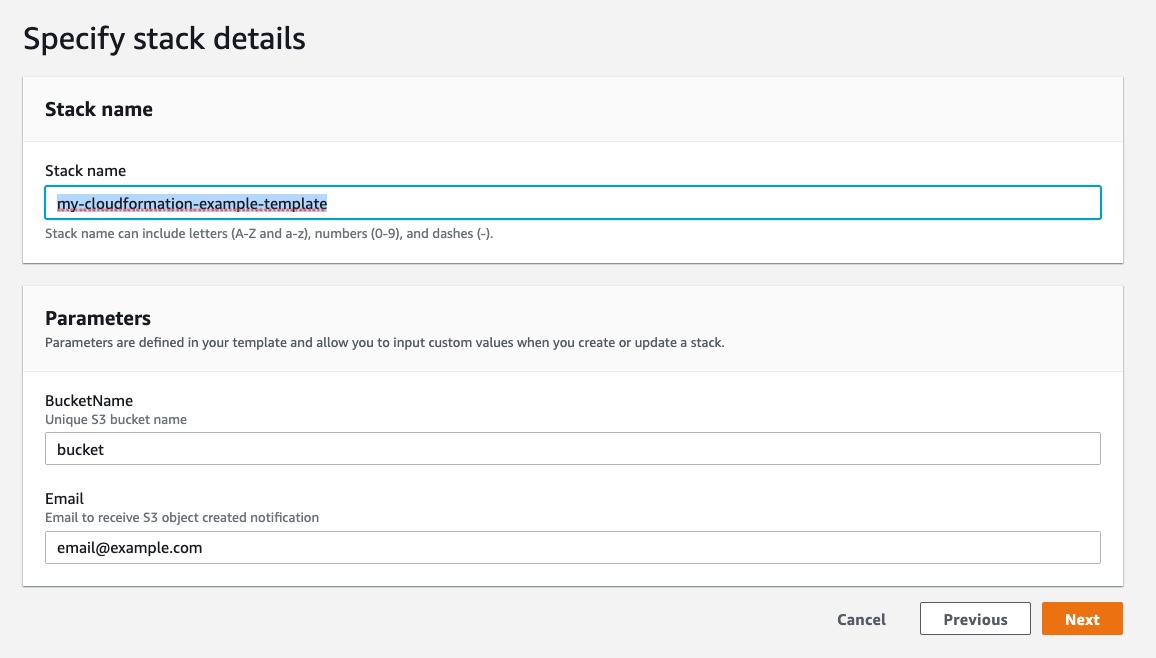
We now need to specify the “Stack name” that will be the name used to identify the stack and change the parameters according to our needs. Try to not give the stack a very generic name, because as we know we used the stack name reference to create all the other resource names. Also, note that in the “Parameters” section we see the default values already populated as we have specified in our template.
Give the stack a name and change the Email parameter with your email address, then click on “Next”:
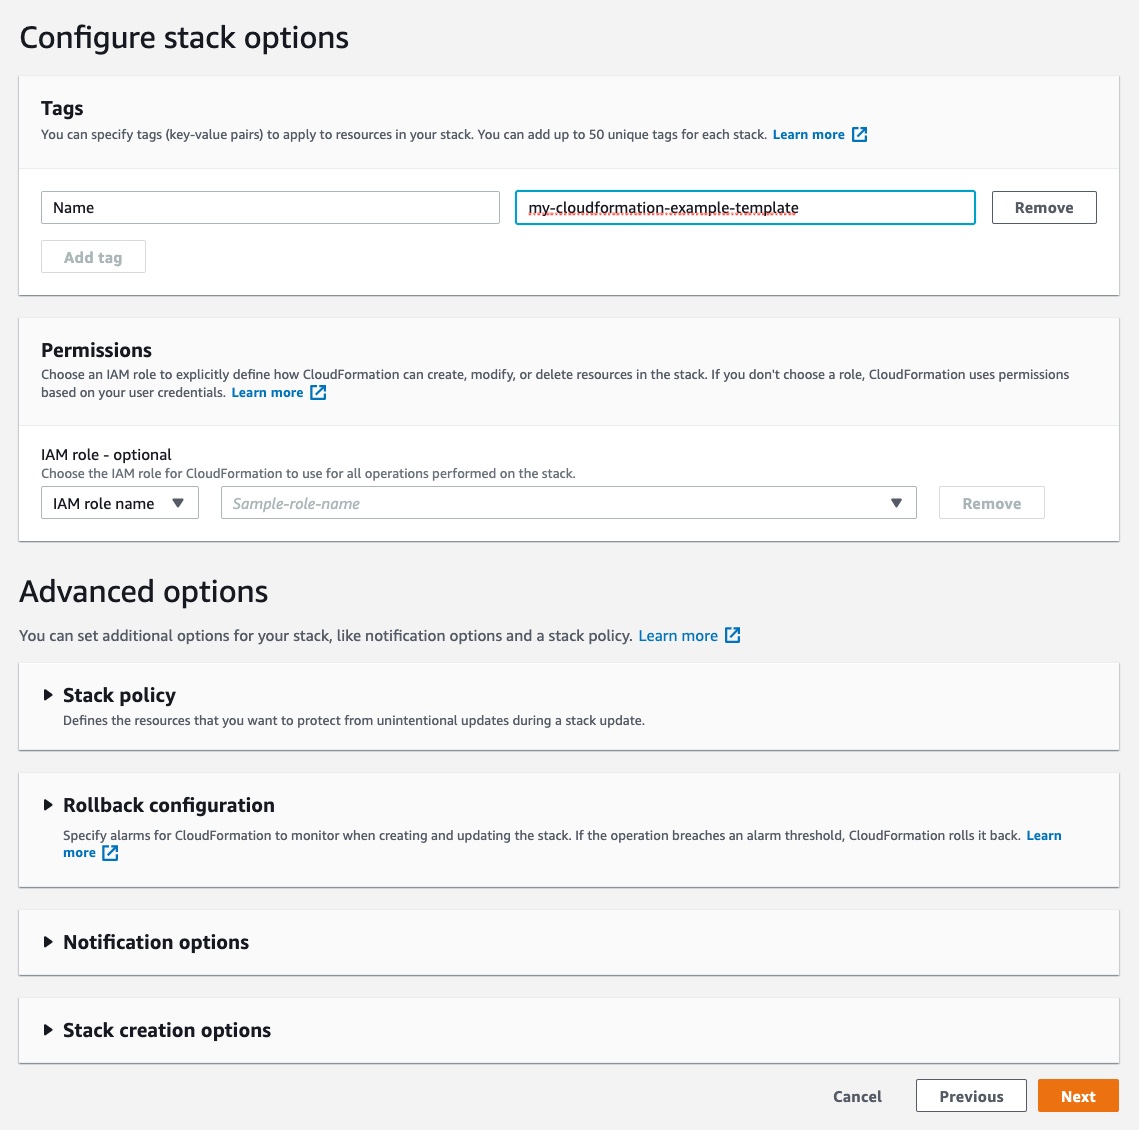
Then, we “Configure stack options”. A good practice is to give a Tag with the “Name” key and a unique value that identify the stack. This can be useful to easily identify costs in AWS.
Give the stack a Tag, then click on “Next”:
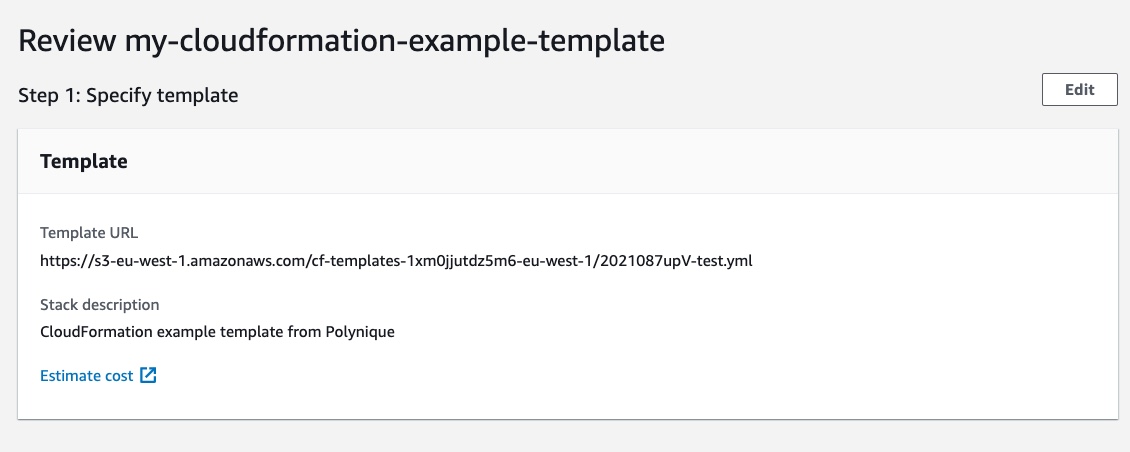
Review your stack, and finally click on “Publish”:
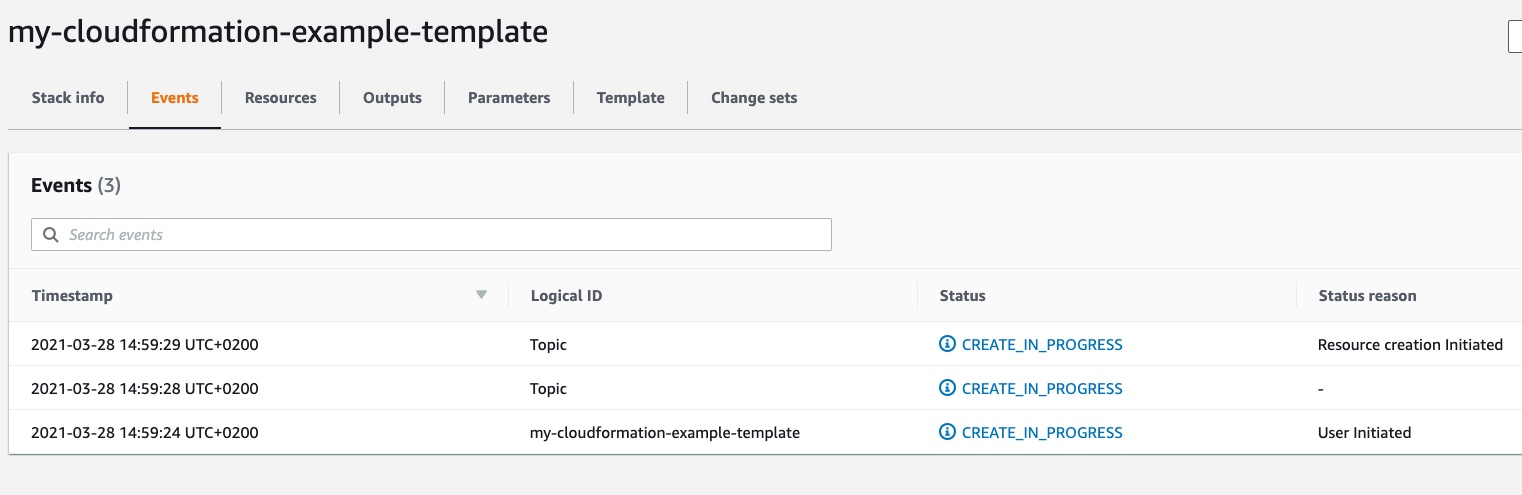
CloudFormation Events and Resources
After clicking the “Publish” button, we will be redirected to the “Events” section of our stack. In this section, we can see every stack’s event, in particular, we see that all the resources specified in the template are in the “CREATE_IN_PROGRESS” status because we just created the stack:
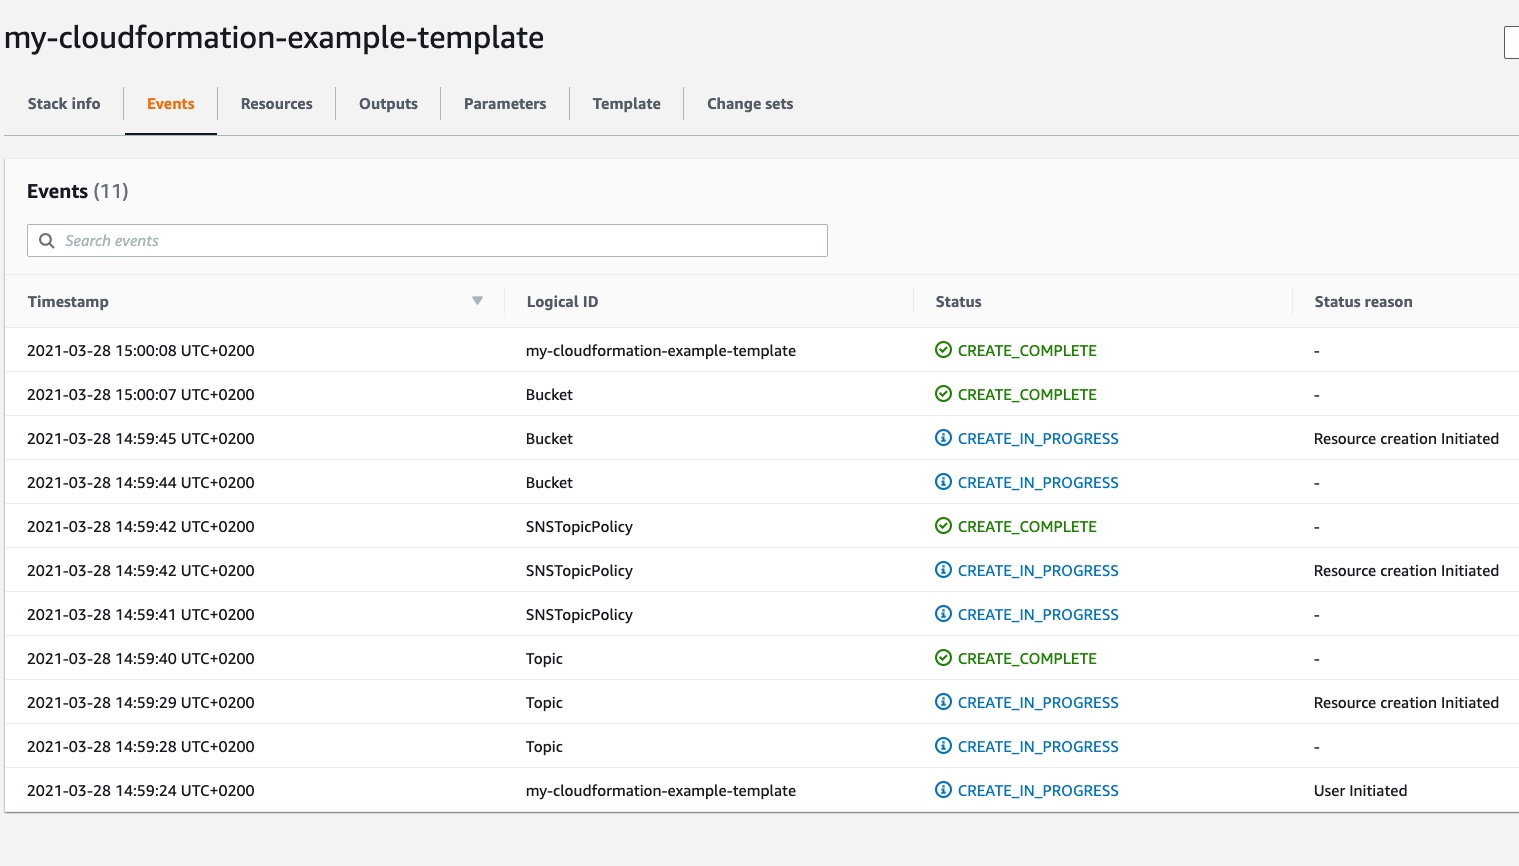
After a while, if we refresh the page we finally see the “CREATE_COMPLETE” status in all the resources:
If we want more details about the resources that make our stack, we can navigate to the “Resources” section:
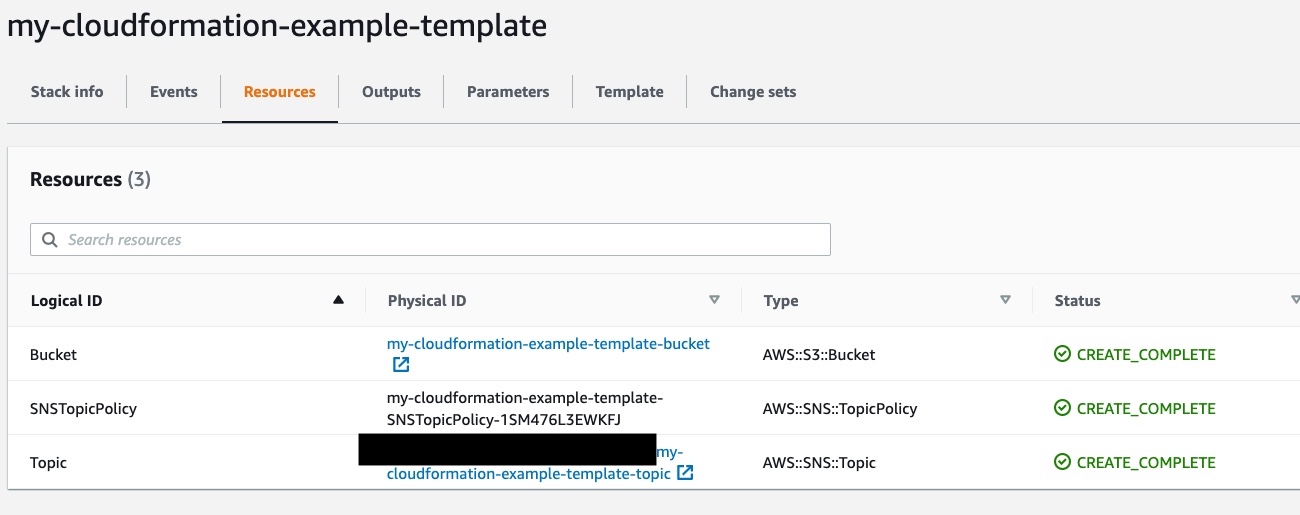
Also, we can click on the “Physical ID” of each resource to open the respective resource page in AWS.
That’s it! We successfully deployed our stack in CloudFormation using a template file.