Receiving emails with AWS SES (Simple Email Service)

Amazon Simple Email Service (or AWS SES) is an affordable, flexible and scalable email service that allows developers to send email from any application. You can quickly configure Amazon SES to support a variety of email use cases, like receiving emails or for transactional, marketing, and bulk communication.
That said, AWS allows us to use Amazon SES for sending and receiving emails on your verified domain. Furthermore, we will be able to manage our mailboxes through SMTP.
Let’s see together how to enable Amazon Simple Email Service to send and receive e-mails through a verified domain.
Verify a new domain
First, we need to verify our domain. We enter the AWS SES dashboard and, under Identity Management, go to Domains. At the top, click on Verify a new domain. A screen will open in which we will have to enter the address of our domain. Check the Generate DKIM Settings box.

After that, you will be prompted to enter a series of domain verification records. If you have registered your domain through AWS, simply click on the Route 53 button to let Route 53 handle the creation of the records automatically on your domain. On the other hand, if you registered the domain through another register, you will have to enter the verification records manually.

Important! Remember to select “Email receiving records” or you will not be able to receive emails!

Click on Create Record Sets and SES will start to verify your domain. This can take from a couple of seconds, up to several minutes (depending on your register).

Once your domain will be verified, a green message will appear.

Receiving emails with AWS SES
To use Amazon SES as your email receiver, you must have an active receipt rule set. A receipt rule set is a collection of receipt rules that specify what Amazon SES should do with mail it receives for your verified domains. Because you’re setting up email receiving with Amazon SES for the first time, Amazon SES automatically creates a default receipt rule set for you.
If your account already contains a receipt rule set, you’ll need to make the receipt rule you create in this section active before Amazon SES applies it to the incoming email for your domain.
In this case, we will use the Amazon S3 service to store the messages we will receive so that we can download and read them.
Creating the Rule Set
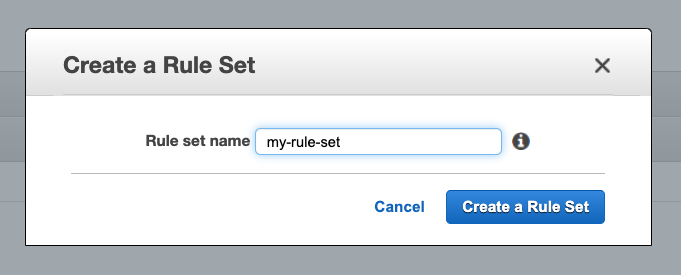
Under Email Receiving, go to Rule Sets. Choose Create a Rule Set. Give a name to your rule set, such as “my-rule-set”.
In the new rule set, click on Create Rule. At this point, you will have to choose a recipient. Leave it blank to apply the rule to ALL of your verified domains, then click on Next Step.
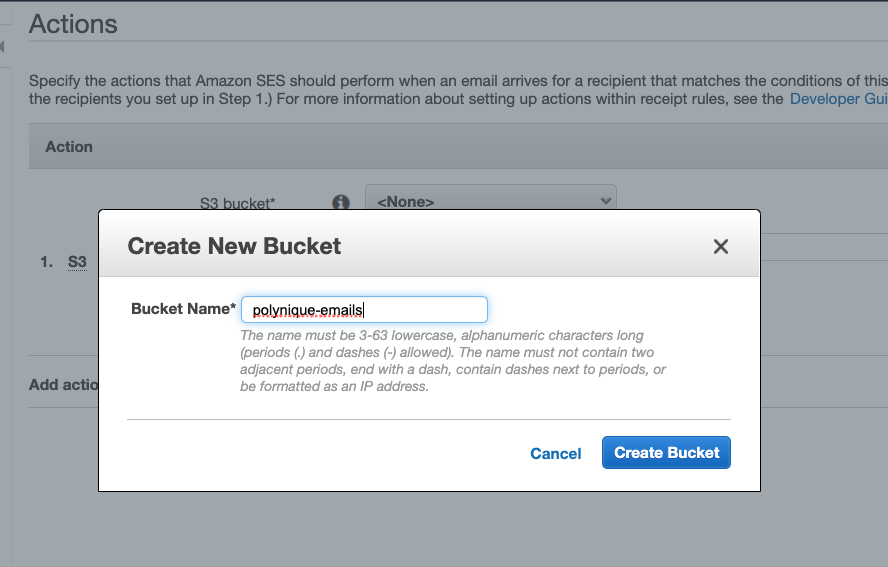
In the Add Action section, select S3. Then under S3 bucket choose Create S3 Bucket and prompt your new S3 bucket name.
After, you can leave as it is and click on Next Step.

Almost done! Give your rule a name, such as “polynique-rule”, and click on Next Step.

One last step. Review, then confirm clicking on Create Rule.
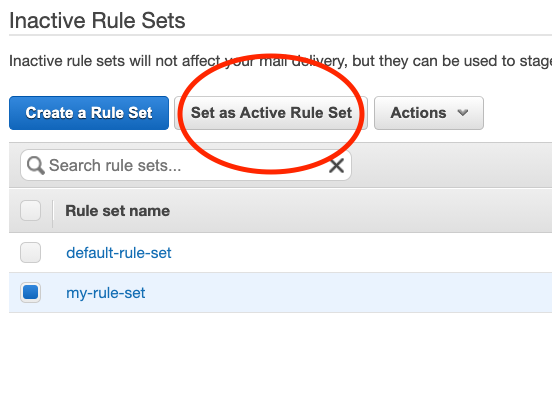
Double check that the new rule set is activated. Under Email Receiving – Rule Set, check “my-rule-set” and click on Set as Active Rule Set.
Testing email receiving
At this point we just have to test. Under Identity Manager, go to Domains. After selecting the domain we have verified, click on Send a Test Email. So, let’s prepare an email to send to our addresses.

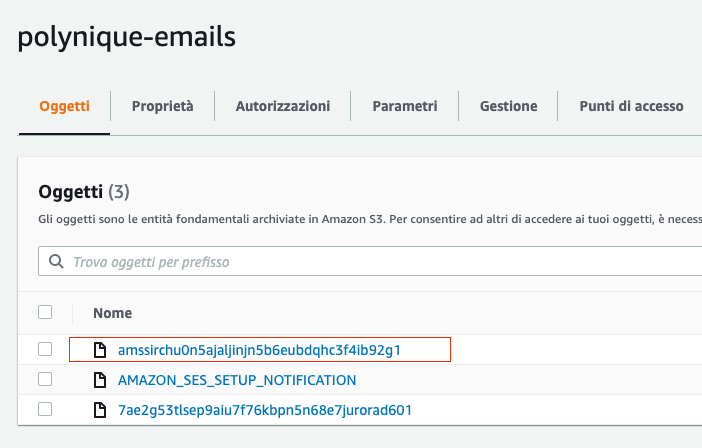
Now we can go inside our Bucket S3 where we will find a new file. The file name is a unique string consisting of letters and numbers.
Finally, we can download the message and read its content.
Sandbox
It is important to remember that all Amazon SES accounts are in Sandbox state by default. Initially, you will only be able to send and receive messages from emails that you have verified through your account. However, unlocking the account is very simple. Just fill out the form and follow the procedure to request Amazon to unlock the account for use in production. Once your account has been unlocked, you can receive and send emails even to unverified addresses.
Conclusion
We have seen how to enable Amazon Simple Email Service to receive incoming emails and save messages inside S3 Bucket. If the solution is not optimal for you, you might consider using the Amazon WorkEmail service.
External Links: